FIRST STEPS
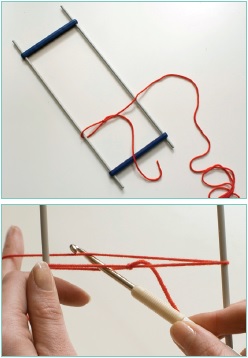
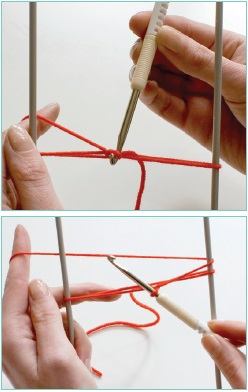
♥ To begin, you must first set the loom to the correct width for the desired strips. If you are using a fork, or fixed loom, ensure that the open end is at the bottom to allow for the length to slide from the fork as you work, making room for the working loops. Make a slipknot in the regular way, without pulling it tightly to close, and slide onto the left, or working, prong of the hairpin loom. Whichever prong is on the left will now be the working prong, as the loop on this prong is the one you always crochet into. Loosen the loop around the working prong to ensure that the slip knot is approximately halfway in between the two prongs. Pass the yarn round the front of the right prong and hold at the back. This tensions the yarn, which will make it easier to work.
♥ Insert your hook from bottom to top in the loop on the working prong, grab the yarn you are holding at the back of the loom and draw a loop through, then work one chain. This completes first stitch of the strip, which is different from all that follow.
♥ Now you must turn the loom, which can be fiddly at first, but will become second nature very quickly. Before you turn, you must pass the hook from the front to the back, as the back will become the working side next. Lift the handle end of the hook upwards and pass the hook through the two prongs to the back of the loom, ensuring you keep the loop on the hook.
♥ Now turn the loom by flipping it around so that the right prong comes towards you while the working prong goes away, and so that the two prongs are then reversed – the previous working prong is now on the right, and the prong that was previously on the right will now be the working prong on the left. Allow the yarn to wrap around the loom as you turn (left).
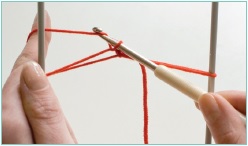
♥ Holding the hook at the front and tensioning the working yarn at the back of the loom, insert the hook under the front left loop on the working prong, from bottom to top, and pull a loop through so that there are two loops on your hook.
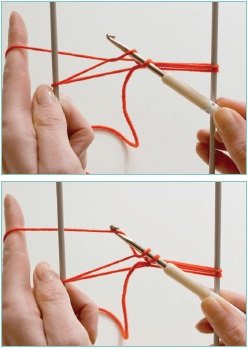
♥ Yarn around hook and pull through both loops on the hook to make a double crochet.
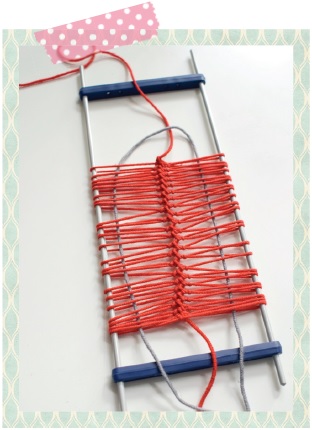
♥ Repeat from *, always flipping in the same direction to wrap the yarn around the loom until you have the desired number of loops on your loom, trying to ensure that the crochet spine is always in the centre of the prongs.Â
SPINES
♥ The spine
demonstrated here is a double crochet spine, but you can create far
thicker or more intricate spines by varying the stitches worked into the
loops – you can work more than one stitch, or stitches of different
height. The pattern text will guide you on which stitches to make.
In Part 2 we'll look at removing the strip from the loom, joining
strips, open loops and edgings. Check back on Friday 16 May 2014.
Tell us your thoughts below.
Sorry, there have been no comments on this blog post yet - why not be the first to leave your opinion?
 Sounds of summer: From catwalk to high street - make your own on-trend wardrobe Read more...

Show your support for Inside Crochet Magazine by adding a button to your website. Simple copy and paste the HTML code below onto your website:
 Read Inside Crochet magazine on the go anywhere in the world with our digital downloads. Available now for iPhone, iPad, Kindle, Blackberry, Windows 8 & Surface!
Download now →